How to get the most out of techno production in FL Studio
That’s no toy. FL Studio (commonly called by its old name “Fruity Loops”) is chock full of uniquely powerful workflows, surprising features, and tons of terrific effects and synths.
The challenge of FL is that it’s overflowing with features. Even experienced FL users may not know all the different ways to accomplish a task – and newcomers can be easily stumped, especially if they come with expectations from other DAWs.
Working with techno is a great way to focus, and FL Studio can bring some big rewards. “Studio” is right – instead of thinking of this as another piece of software to learn, imagine you’re stepping into a new project studio. You might find instruments and effects that work elsewhere. You might take advantage of the mixer and multiple patching options. Or you might settle in and find that this studio is the right place to work now.
Quick tour
FL Studio has a bunch of elements that will look familiar to users of other software, but with unique twists you’ll want to take advantage of.
![]()
Transport. The menus, transport controls, shortcuts to views. Pay attention to the left-hand side tool tips, if you’re new, as they’ll help guide you.
What’s different about it. FL Studio approaches DAW workflows more like hardware. So note that there’s a master pitch control at left, which thanks to deeply integrated sampling actually works as expected. And note tons of shortcuts available for recording – particularly the Audio Recording button (it looks like a microphone). From there you can sample directly into the built-in audio editor (Edison) or the Playlist (an arrangement tool).

Channel rack. This houses instruments, plug-ins, MIDI inputs, and so on.
What’s different about it. Not just a virtual rack, the Channel rack also integrates its own step sequencer and pattern editors so you can sketch ideas from it directly. It’s perfect for techno because you can obsess over getting a groove just right.

Playlist. This is your arrangement view, but it also lets you compose with small and big blocks of time to create song structures, and it stores clips of automation and patterns.
What’s different about it. The Playlist looks like every normal DAW - at first. But automation is all stored as its own clips, making it as easy to work with automation as it would other region types. And then there's audio: each time you add audio to the Playlist, FL Studio uses a Sampler instance to play it. That meant that behind all audio is a sampler - with all the controllable parameters that entails. (Imagine I'm making the appropriate "mind blown" gestures here.)
In short, if you're getting stuck in some habits in other DAWs, this flexibility is a chance to spice up your editing life.

Mixer. An endless, endlessly customizable mixer view.
What’s different about it. You can route freely between channels without being restricted as you would on a hardware mixer. Insert slots have their own dedicated wet/dry controls in the insert slot. So instead of hunting around in a plug-in UI and then discovering it doesn’t even have a wet/dry control, yo
What’s different about it. You can route freely between channels, for sidechaining and sends without being restricted as you would on a hardware mixer. Insert slots have their own dedicated wet/dry controls in the insert slot. So instead of hunting around in a plug-in UI and then discovering it doesn’t even have a wet/dry control, you can tune the balance of different effects through the chain. And you have tons of customization options for the Mixer in general, including the ability to see waveforms in the channel strip.

Piano roll. Editor for MIDI sequence data.
What’s different about it. There are tons of options for painting in patterns here, the ability to freely mix drum-style and note-style editing, integrated glide/portamento, and even per-note expression – a feature FL Studio has had for a remarkably long time.

Plugin picker. Yeah, this is a toy box after all. For built-in FL instruments, hit F8 and you get a pretty pop-up view of gear. For plug-ins, hit shift-F8 which opens the browser. (You can configure FL to make sure it finds all your plug-ins, including VST3 or, on the Mac, AU. That works even if they’re scattered in multiple locations, as often happens on Windows.)

Assemble a virtual rack and make a pattern
Start a track. New in FL Studio 20.7, there’s an updated 808 template. Not that you should stick with the template, of course, but this gets us going quickly. Choose File > New from template > Minimal > 808 with Limiter.

Meet the Channel Rack. It’s best to think of FL Studio as a virtual rack of gear that you use with your arrangements, not just a software arrangement tool. The first thing you see is accordingly called the “Channel rack” – it’s a home for virtual instrument sources. This window looks almost stupidly simple, and it’s even possible to ignore it and use FL more like a traditional DAW. But it has some fancy tricks that make it worth experimenting with.
Create a fill. The Channel rack by default shows step sequencers for each part – so we can whip up a fast pattern, x0x style, by pressing the buttons.
There’s also a menu that lets you fill every 2, 4, or 8 steps for fast rhythmic subdivisions.

But select Advanced fill for some serious fun. This lets you set number of steps and fill patterns, and even use a fancy distribution to make these patterns more symmetrical (the now-infamous “Euclidean” pattern). If you didn’t quite follow, there’s a useful visualization and you can use that and your ear to explore (as you should anyway).

Those are Samplers in there. These aren’t just simple drum presets; they’re each produced by using individual Sampler instances. Click the Kick part, and you’ll bring up its Sampler. FL’s Sampler is clean and easy to follow, but deeply integrated with FL Studio – and you can do a lot with it. All of these parameters are ripe for abuse and experimentation. (I don’t recommend this, but for instance I started messing with Crossfade on the kick to produce a creepy, industrial, droning sound.)

Click on the envelope and wrench icons at top, and you’ll see this really is a full-featured sampler, with multiple envelope generators, excellent-sounding multi-mode filters, modulation, arpeggiator, and basic echo with feedback. (Try “fat mode” in the delay.) You could even try challenging yourself to using just this 808 template and take it somewhere quite different.
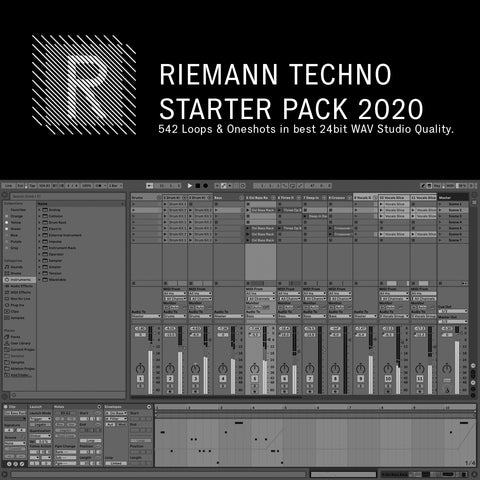
FREE Sample pack: 542 Techno Loops & Oneshots
Download in here: Free Sample Packs
Envelope - which also includes other modulation and a multi-mode filter.

Miscellaneous - including an arpeggiator, a delay, and more.
Click back on the waveform at left, and let’s see how this fits into the Browser. Under File, you can swap your own samples – like working with the Riemann Kollektion sounds, for instance. If you click the small icon between the folder and X icons, you can bring up sounds in the Browser.

Browser. The Browser is a useful and flexible location where you can build up collections of patterns and sounds. It’s really a great way place to customize your FL work environment. Ableton Live users will find it’s familiar having it be a pane on the left, but it does a lot more than Live does – it’s also a place to stash impulse files for convolution, stuff from the clipboard, envelopes, every kind of preset (even for the mixer), bits of audio, templates… everything imaginable.
Here, you can try swapping out some of these default sounds, for instance..
Add a new part to the Rack. You can add new parts by clicking the + icon at the bottom of the window. In this case, I don’t want that 808 snare, so let’s replace it. Right-click the Snare, and choose Replace > Synth Classic > Transistor Bass. Yep – this is a serious 303 emulation, with a ton of extras, too (distortion, delay, cavernous reverb, and lots of tweaks an options). It’s also got its own internal sequencer; if you leave that on, steps in the Channel rack will retrigger the start of the sequence.
![]()
You can continue this way, adding internal FL Studio’s synths (and there are a lot of those, even without buying the high-end edition), plus all your third-party plug-ins, and external MIDI gear.
Routing between Device rack and Mixer. This can be a bit confusing at first – the Device rack exists separately from the mixer. That means its volume and pan settings are not the same as the ones on the mixer channel. Also, while the first four parts in the template were already routed to the mixer, the fifth part we added was not.
Right click that fifth part and choose Assign to new instrument rack. This patches your Device rack into the mixer.

You can quickly assign all the rows on your Channel rack to separate mixer channels, from the menu at the top-lefthand part of the screen.

Now each has a corresponding mixer channel - and its inserts.
Construct some musical materials
Tweaking patterns in Device rack. What looks like a dumbed-down, one-bar step sequencer is actually a lot more sophisticated. Note that swing and pattern length options are located right on the top of the window. You can even set more advanced per-part looping options and per-part swing – they're tucked into the menu at top left.
You're also not restricted to just the x0x (Roland)-style step editor.
The Graph Editor lets you visually edit specific parameters, including two modulating macro-assignable mod controls.

And if you select Pitch in the Graph Editor, you get a bite-sized Piano Roll editor which lets you edit MIDI notes - both for full drum kits or drum instruments and melodic instruments.

Make variations. Underneath the transport, you’ll see there’s a display labeled Pattern 1. Once you have a pattern you like, let’s make a couple of variations. Right-click the Pattern menu and choose Clone (check the shortcut, shift-ctrl-c). Now you can alter the pattern. Clone, repeat so you have some various pattern choices.

Make an arrangement. Here’s where FL gets really quick once you get the hang of it. Open the Playlist. Your patterns appear on the left, along with audio clips and automation clips. Choose the Paint tool from the toolbar, and you can paint repetitions of each. Plus you can do all of this without getting lost in destructive edits that can be a major time suck as you try out different ideas.

To hear the results, switch from playing back the pattern (what’s displayed in the sequencer in the Channel rack) to the song. There’s a PAT / SONG toggle right next to the play button.
![]()
Edit on the fly. To delete something (without switching to the eraser), right-click on a pattern in the Playlist.
Double-click on any part in the Playlist to open up the Piano Roll (for MIDI patterns) or Sampler (for audio).
Split patterns by channel. Okay, there’s just one problem – your initial groove started with your kick, hats, bass, and everything playing all at once.
Right-click a pattern and choose Split by channel, and your parts will each be a separate pattern. You still paint freely into the Playlist – you don’t have the usual rigid structure of tracks and channels.
Set up your samples and mixer
Have your samples ready. Audio content is useful all over FL Studio. Let’s add a couple of the Riemann Kollektion tools. There’s the Riemann Techno Starter Kit, which is an ideal companion to FL Studio. I dragged both that folder and one of the Industrial Kits directly into the Browser.
In the Channel rack, you can add a Sampler and then just drag and drop samples from the Browser directly onto them – as we saw with the simple kick and hat above.

Loading in your RK samples - just drag and drop them onto each channel, with a Sampler instance loaded in.
You’ll find other uses for samples, too, though. Edison is a full-blown wave editor that’s integrated with the software, so you can fine-tune samples, edit them, slice them, and then add them to the project. It’s also a loop recorder and sampler.
Fruity Granulizer and Wave Traveller let you do some far-out manipulation of samples – even making them unrecognizable if you want.
Create a new template. We used a built-in template before, but you could quickly make one for your favorite samples and instruments. This time, create a new project, and choose New from template > Empty. Add some instances of the Sampler, and drag and drop some samples, like the Riemann ones.
Route your instruments. If you open the Mixer, newcomers will be surprised to see that everything is currently just playing through the master out. That’s because unlike most DAWs, FL Studio treats the mixer as a separate device you can route to freely – you aren’t restricted to each track in the Playlist (arrangement) or Channel rack being locked to a one mixer channel each.
To quickly give our parts individual mixer channels, select all of them (drag across the rectangles just to the right of their names, before the step sequencer), then click the menu at the top left of the Channel rack and choose “Assign selected to free mixer track(s).” Note the ctrl-L shortcut.

Add effects. Click on a track, and on the right you’ll find a set of inserts. Click one of them and a menu shows up – by default, it lists all the internal FL effects by category (including some off-the-wall stuff like a 3D game engine visualizer).
Click “More plugins” at the top to find all your third-party plugins. Like everything else in FL, there are loads of options for how this appears.

Here I’ve selected the Fruity Reeverb 2. Note the knob and small green bulb to the right of the insert. You can choose the amount of effect processed by the insert without the usual chore of having to set up a send/return. And you can disable/enable the effect with one click, which is useful for A/Bing your effect settings.
There’s also a handy built-in 3-band EQ for each channel.
Mixer tricks. The FL Studio Mixer does some things most software mixers can’t. You can send from one track to any other track. With the source track selected (its meter/waveform view at top will be highlighted green), click the Enable send button at the bottom of the destination mixer channel. A new patch cord will appear from source to destination; you can adjust the level with the knob that appears. This is useful for fast send/returns, or interesting parallel processing applications.

If you turn the knob to zero, that same patch cord works for sidechaining – and you can use it to drive, for instance, FL’s Limited for pumping sidechain dynamics and the like.
There’s also a set of spatialization tools built into each channel that normally require specialized plugins. Underneath pan, you’ll find one-click access to reverse polarity and swap left and right (which you can use to find and solve phase cancellation problems, for example). Then there’s a third “stereo separation” control. In addition to left/right pan, you can make any channel more focused or wide in the stereo field, right from the mixer (without plugins).
Add automation. We already used the Playlist to arrange our patterns and audio. We can use it for automation, too, of course. Right click any parameter in an instrument, effect, or mixer, and choose “Create automation clip.” You then have a clip in the Playlist with editable envelope you can use to control that parameter.
For the simplest example – fading out a track – you would right-click the corresponding mixer fader, select “Create automation clip” and then make the automation curve you desire.

There are some wild possibilities here, though, especially as even most parameters in the Sampler can be automated.
Automation clips are one of the deepest parts of FL Studio. They even work with LFOs, can be attached to audio, and have loads of options for editing, slicing, shaping, smoothing, and producing various shapes and patterns. Some of the actual editing options could leave you feeling disoriented if you come from other software, so if you read just one part of the FL manual, check this one:
https://www.image-line.com/support/flstudio_online_manual/html/playlist_automationclip.htm
I literally bookmarked this one for myself - it's the one page you're likely to refer back to the most.

You have extensive control over automation shapes - but just as importantly, you can freely move automation clips around just like other clips.
Explore more fun techno tools
Now that you’ve got some basic ideas, there’s plenty more to explore. Specific to techno:
You can use the Playlist as a live performance tool – a bit like Ableton Live’s Session View, but with FL-specific features and workflow. (Check templates for pre-configured layouts for the Novation Launchpad and Akai Pro APC and other hardware.)
Image-Line Remote for both Android and iOS gives you a touch remote control – which is especially useful as you’re learning, too.
You’ll find loads of distortion – F8 for plugin picker, then Distortion. Blood Overdrive is a particularly brutal drive effect – fantastic on kicks. Distructor is a four-slot multi effect, with each slot letting you choose from distortion, filter, chorus, and speaker.

There are also essential dynamics effects, of course – an updated Compressor/Limiter, but also an excellent Transient Processor.
Fruity Convolver is an especially rich convolution reverb with lots of extras – not just for the usual church big-space effects, but also subtle flanger and delay and rhythmic possibilities as well as rooms, plates, and other spaces. And it’s integrated with FL’s sample support, so you could convolve with your own samples – try convolving with a percussion one-hit, for example!

We've been using samples, but there are a huge number of synths, covering all bases - FM, additive, subtractive, wavetable, hybrid, and even some unique simple options (like a modeled bass).
You also can opt for a synthesized kick, with BassDrum:

And there's even an MPC-style pad-based sample instrument, the FPC.

That would be overkill, but you'll find some familiar controls and layout, and it's drag-and-drop compatible with sample features elsewhere in FL.
For advanced rigs, there's also a feature called the Patcher that lets you visually combine elaborate routings of internal and external plug-ins, on top of the features of the Mixer.
A plan of attack
Now you've got an overview of where to look, and hopefully some tips. Even some existing FL Studio users may have overlooked the fine-tuning Image-Line have accomplished in bread-and-butter portions of the tool - like the Sampler, Channel rack, and Mixer.
Sampling live or arranging a song, you might take a different approach. But FL Studio has a clear pathway for executing techno:
1. Treat the Channel rack as your gear rig, and build up some "locked groove"-style patterns with variations.
2. Make use of the mixer to add effects and color - which you can use to produce some elements of surprise with novel routings.
3. Paint your arrangement into the Playlist to make your musical structure effective and fluid.
4. Add automation clips for more variety.
Now also interesting, because there's no real distinction between the performative/clip-based and linear timeline portion of the Playlist, you might be uniquely able to turn this into a live performance. Plus, every pattern in FL Studio can easily be bounced to audio - again, everything is a Sampler.
Also worth considering, because of the richness of built-in tools in FL Studio, it's a great candidate for collaboration online, which often becomes overly rigid in other tools.
You also don't have to make this an either/or choice with existing DAWs. FL Studio's ability to bounce lots of audio means you can make clips for Ableton Live or hardware drum machines (for example). You can even run FL Studio itself as an instrument in another DAW, as well as many of its plug-ins, for maximum flexibility. (Some of this support is still evolving on macOS, but it's there.)
That means FL Studio gives you a whole bucket full of tools to play with in other environments.
Subscribe to our Youtube channel for tutorials and free sample packs!
Related articles
Beginner's Guide to Experimental Techno Music by Alicia Clark
How to unlock the techno powers of Logic Pro X 10.5